

Since the start of the pandemic in 2020, teachers have been turning to Zoom's teaching tools in numbers and there's good reason. Want to know how to use Zoom for teaching? You've come to the right place, as we cover how to do just that in this step-by-step guide. Teachers love Zoom because it provides them with lots of useful tools and allows them to continue teaching throughout the pandemic and beyond. Here's some useful tips and tricks to make teaching on Zoom even more enjoyable!
Using Zoom for teaching has also opened up a new stream for many teachers, who now use a combination of online classes and in-person classes to connect and meet with their students.
If you're a teacher, you may already be familiar with Zoom, but if not there are a number of virtual features you should be aware of, and confident in using and explaining, in order to teach a class.
The first thing to remember is that Zoom online classes are live. The great thing about this is that it encourages interaction and engagement between teachers and students (and students with other students!) during the class, just like in-person. This means joining an online Zoom class can be just as interactive as in-person workshops and events.

Zoom's teaching tools explained:
- How to use Views and Spotlight Video
- Zoom screen sharing explained
- How to use the Whiteboard feature
- Raise Hand feature
- How to use Mute when needed
- Breakout Rooms
1. How to use Views and Spotlight Video
When students join, the default layout for their video will be the speaker view. This view means that the video feed for whoever is speaking (or making sound) will take up the full screen.
This view will work for classes that require you, as the teacher, to demonstrate when using Zoom for teaching.
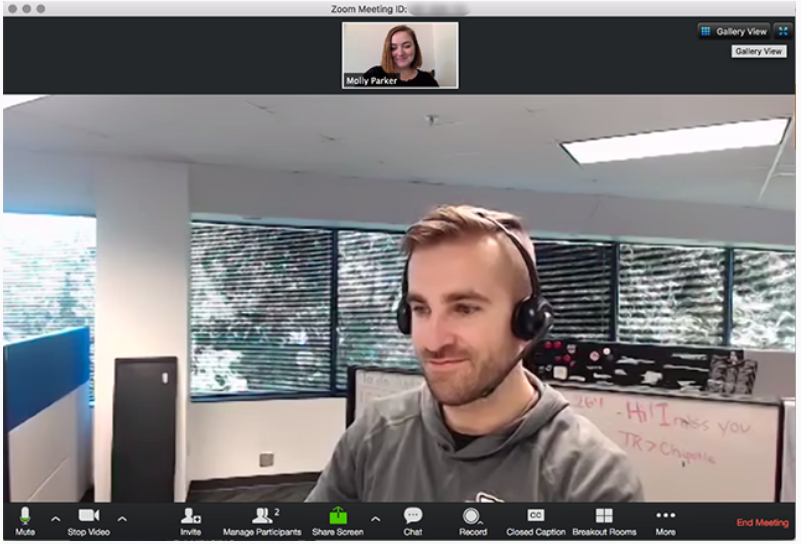
However, you can ask your students to swap to gallery view which means they can see all the participants, and you the host, at once in a tile format. This will work for classes that involve group discussion.
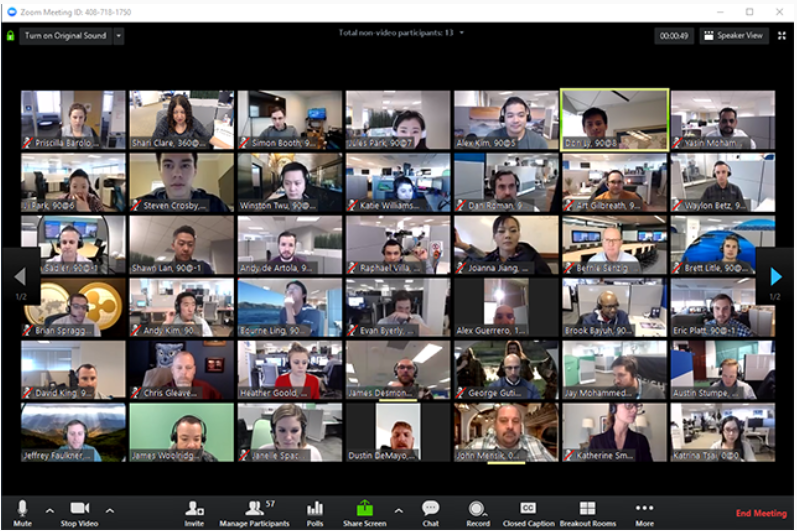
As the host, you will want to keep your students on a Gallery View but most likely want to ask them to keep their screens on a Speaker View so you take up their full screen (just make sure you are the only person speaking/making noise, and use the mute button when necessary).
You can also use the spotlight video feature that will enable you, as the host, to force your screen to be the largest on Speaker View even if others are speaking or making noise.
As you can see in the images above, you can adjust and choose your layout at the top right hand side of the screen.
2. Screen sharing on Zoom
During the introduction of your class, you may want to take students through the history of your subject, or use visual aids to help explain more complicated techniques.
This is when screen sharing comes in. Students will be able to see everything you do on your computer, just like they were in the room with you, viewing your screen. You can prepare presentations and materials to share with your students when using Zoom for teaching.
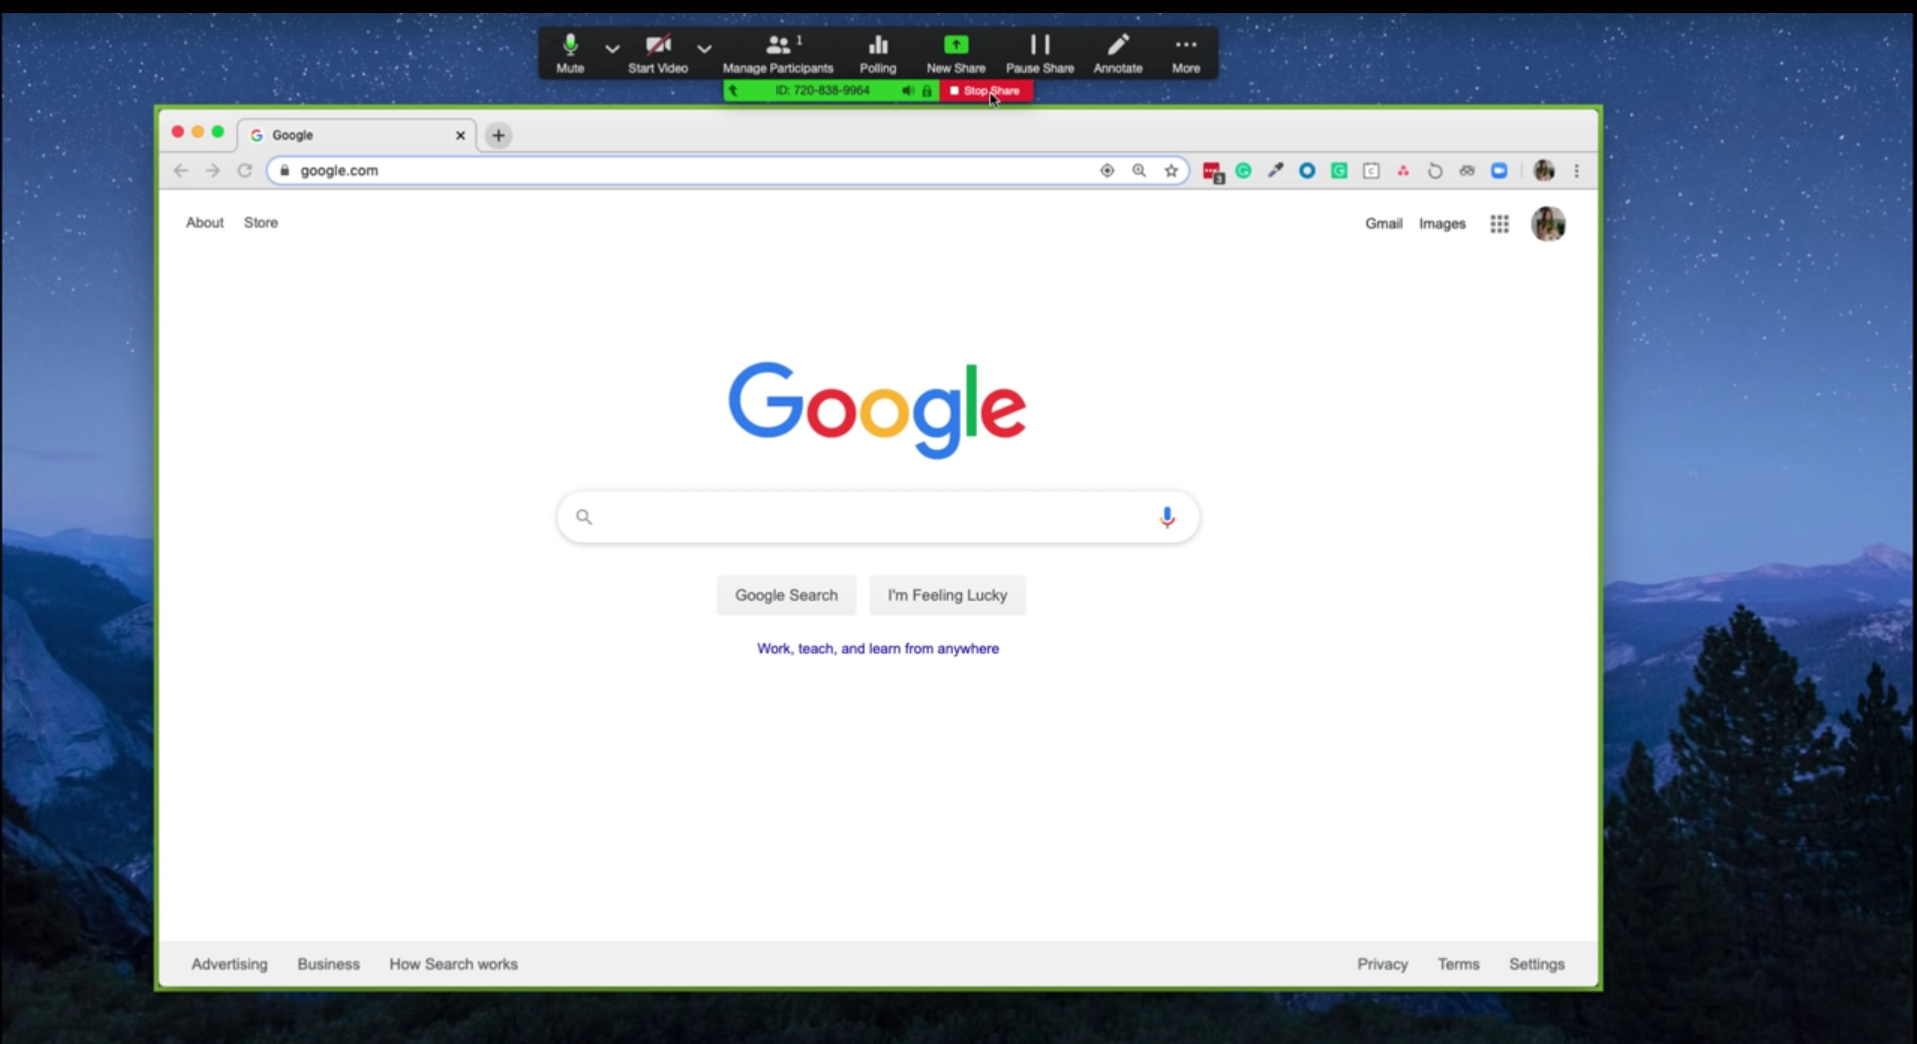
Zoom also lets you share your computer's audio, meaning you can share your screen to show a video online, or one you've created earlier. Mixing and matching the pre-recorded and live video class.
To share your screen, simply click share screen on the control panel at the bottom of the screen. When it's time to stop sharing your screen, click stop sharing.
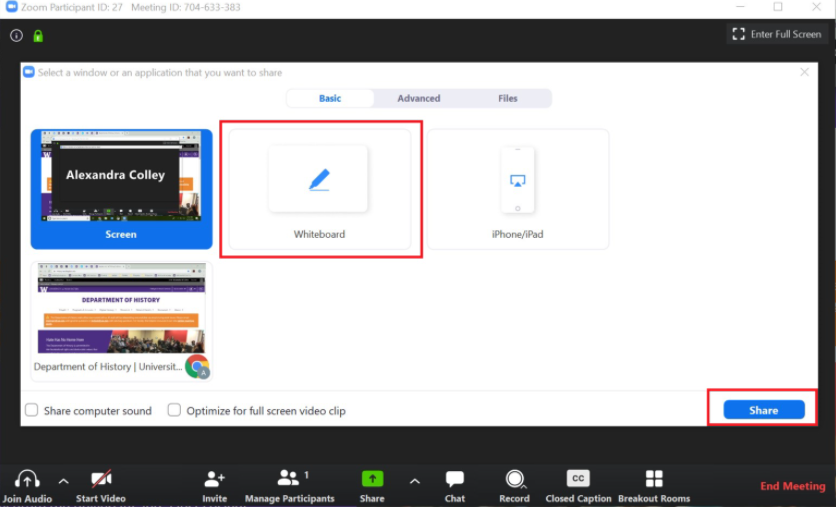
3. How to use the Whiteboard feature
This feature is available when you are sharing your screen and works the same as a whiteboard would in a classroom. Teachers can access the whiteboard by clicking share screen at the bottom of the screen, then clicking whiteboard. On the whiteboard, teachers can write, draw and share discussion notes with students!
At the bottom of the screen, there will be the option to create new pages and go back to previous pages of notes you have made on the whiteboard.
Teachers can choose to allow students to also annotate the whiteboard too, which makes online classes more stimulating and interactive.
4. Raise hand feature
Using the raise hand feature is a good way to allow students to ask a question when muted. They can use this by clicking the Participants tab at the bottom of the screen and selecting the hand icon next to their name.
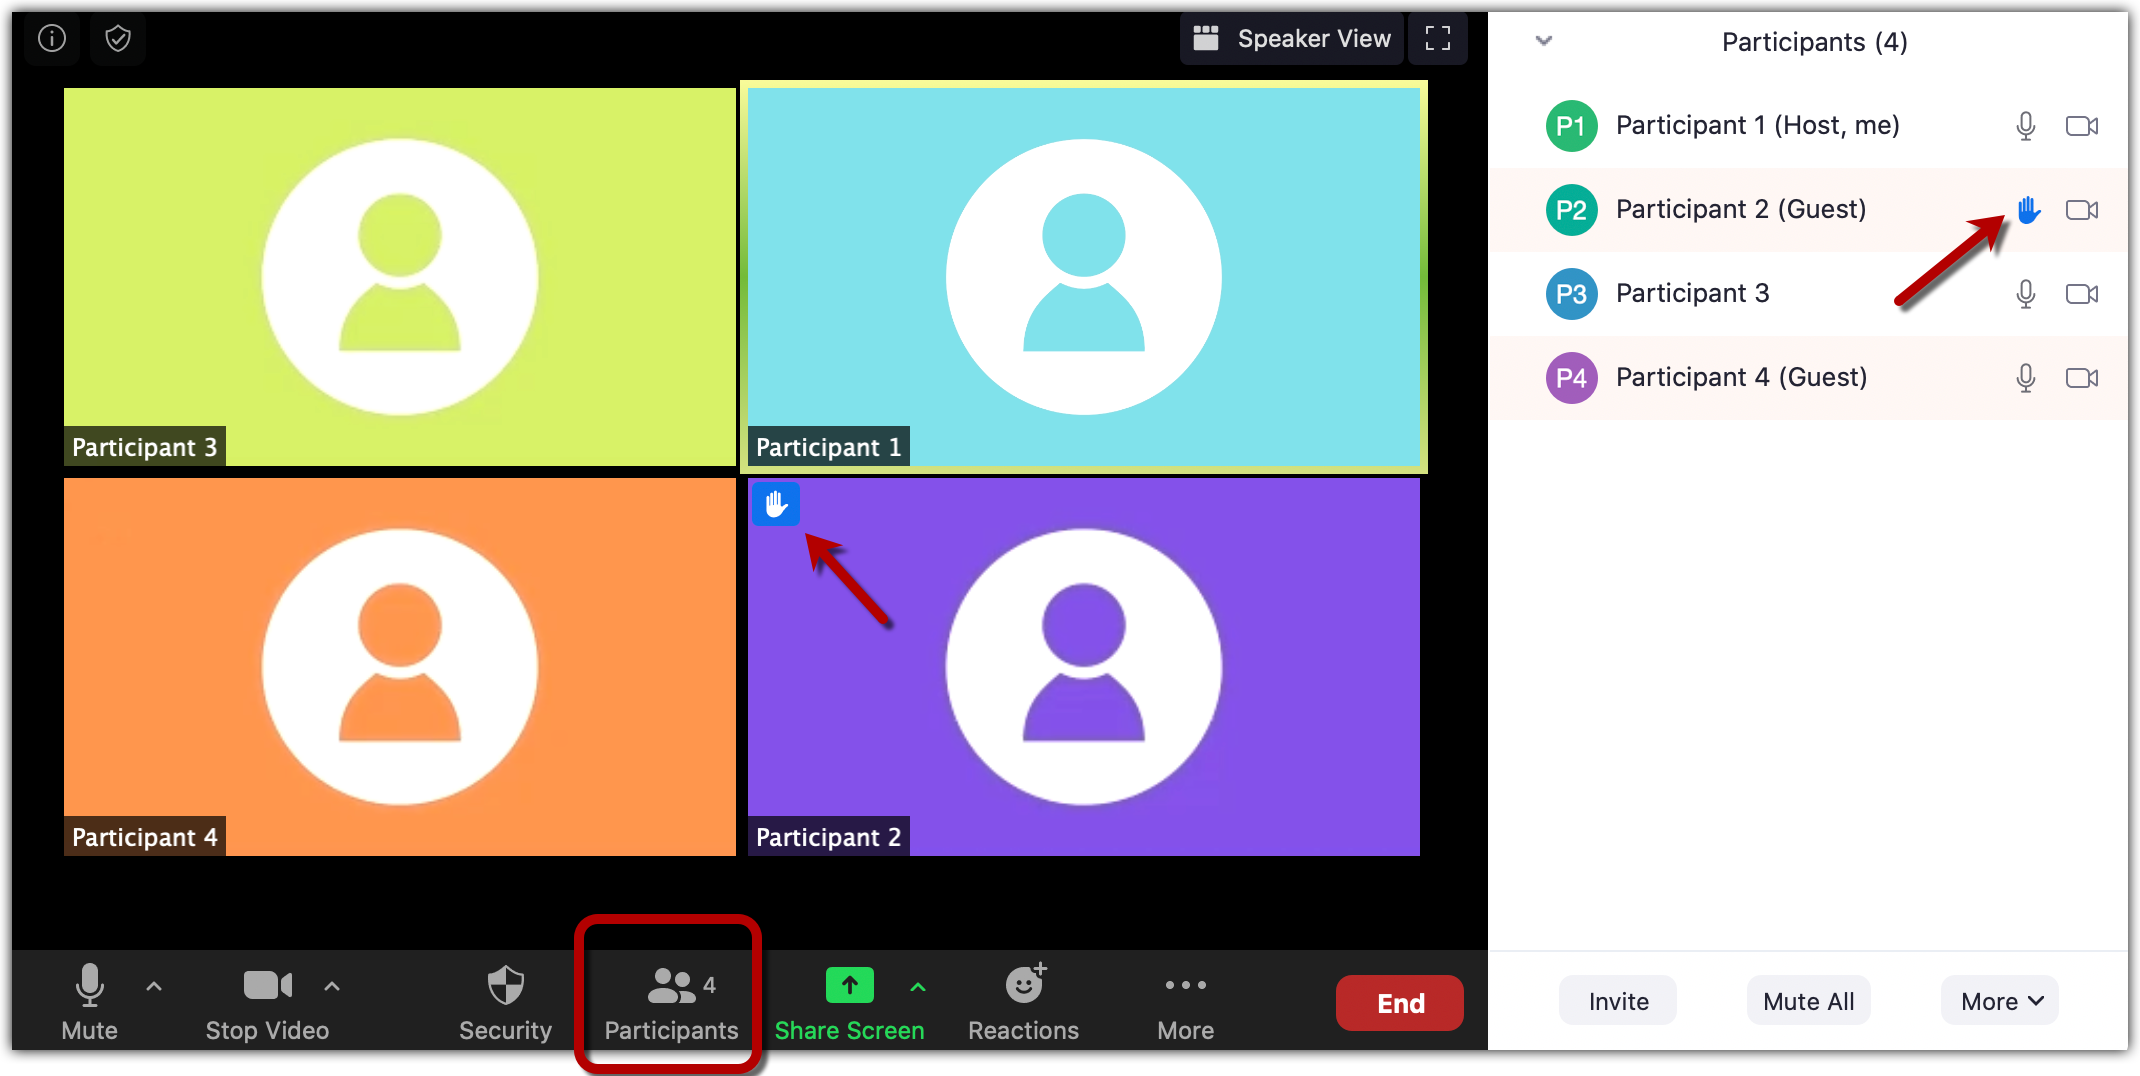
This is a great tool when using Zoom for teaching, as it allows students to get the teacher's attention without interrupting the flow.
5. How to use Mute when needed
When students join your class, you may find there's a conversation going on, or none at all. When using Zoom for teaching, you need to learn how to manage participants virtually, and this is when the mute and mute all buttons become essential.
Once every student has joined the class, it's nice to start by letting everyone introduce themselves, as you might for an in-person class. And as you would point to a student in-person, you can use the Mute button to indicate who should speak next.
When you want to start the class, it may be worth muting all students while you are speaking. This will make sure you are the speaker in the Speaker View and ensure no background noises from students affect anyone else.
Using the mute feature couldn't be easier! Simply click the mute button on the control panel at the bottom of the screen. If you would like to mute students, click participants, then click mute all. Many teachers choose to click allow all to unmute themselves during discussions.
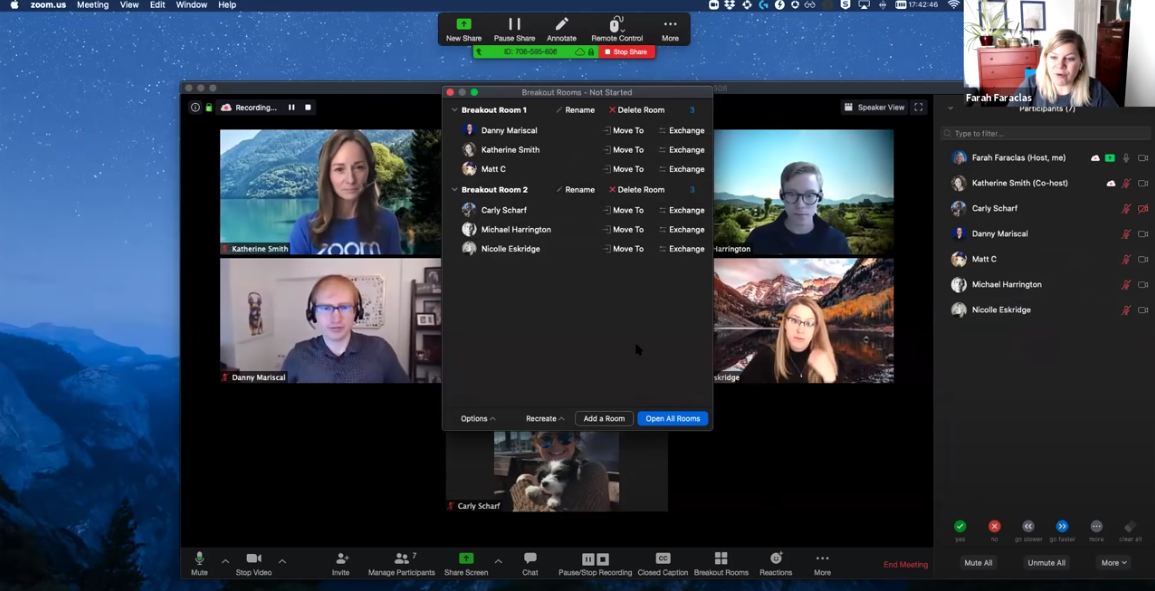
6. Breakout Rooms
Make use of the breakout rooms function to set projects in the class for a smaller number of the participants. As you might during an in-person class, you can similarly set smaller tasks and projects for groups within your class.
As the host, you always have access to each breakout room, and can check in on each set of participants as you go along. This is also a great way to open discussions with a small number of students to allow for all voices and questions to be heard.
If teaching children, the breakout rooms feature is particularly handy in managing your students and ensuring every child has the best chance at learning.
Creating breakout rooms for your students is very simple! Only the host/teacher will be able to create breakout rooms. Within the control bar at the bottom of the screen, click the breakout rooms tab. Then choose how many rooms your want to create and how many students you want within each breakout room.
Teachers can choose to create the breakout rooms automatically. This means students will automatically be assigned to a breakout room at random. However, if teachers choose to create the breakout room manually, then they can choose which students go in each breakout room.
Going between the breakout rooms is very straightforward, just click join to enter the breakout room and see how your students are doing! Only the teacher can go between the breakout rooms.
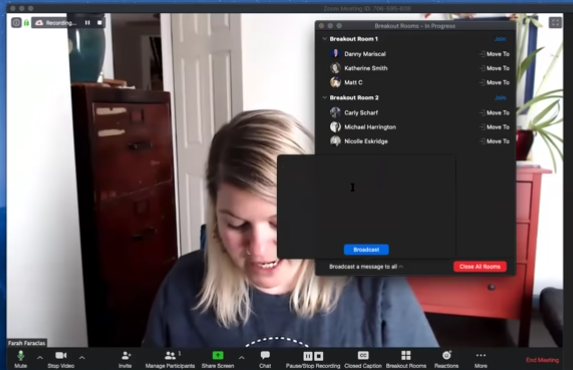
When you want the students to enter their breakout rooms, click open all rooms. By clicking broadcast to all, teachers can type out a message to send to all breakout rooms.
When you are ready for all of your students to leave the breakout rooms, click close all rooms. This gives students a one minute countdown before they all return to the main meeting/class.
Need more teaching advice?
Mastering how to use Zoom means you have mastered a new, exciting and interactive teaching style! Live online classes and workshops have become a popular way for students to build their skills, while also joining a new team or group of other like-minded students wanting to learn within a fun and informative virtual class.
Got teaching on Zoom down? But not sure how to manage your bookings in the first place? There are many tools out there, but Obby has brought together all the best features into one class booking system. Not sure how to turn your in-person classes into online classes on Zoom? Get ideas from what other teachers are doing in our Learn from Home class list on Obby.
Unsure about the etiquette for teaching on Zoom? Take a look at Obby's Dos and Don'ts for teaching online. Need more great teaching tips? Review our related guides below:
- Top 13 Best Online Course Creation Tools
- Top 5 Best Booking Systems for WordPress
- Top 7 Best Appointment Booking Systems For Yoga Studios
- Top 5 Best Squarespace Booking Systems
- Top 7 Best Booking Systems for Websites
- Top 10 Best Booking Systems For Small Businesses