

Throughout history floral crowns have been worn for several reasons, varying from marking summer celebrations in Scandinavia to being a symbol of someone’s virginity. The humble floral crown dates back as far as Ancient Greece, where it was used to honour the gods. The most recognised floral crown historically was the Laurel wreath used to honour Olympians (instead of medals) in the Ancient Olympic games.
However, nowadays you’re more likely to see Beyonce sporting a floral crown on the latest cover of Vogue. Floral crowns have returned to the mainstream in recent years promoted by many a glittering festival goer headed to Coachella or Glastonbury. Long live the Floral Crown!
Instead of buying a floral crown, why don't you have a go at making your own? In this illustrated step-by-step guide east London florist, Lucy Burton, will guide you through the steps to making your first ever flower crown, made from real flowers!
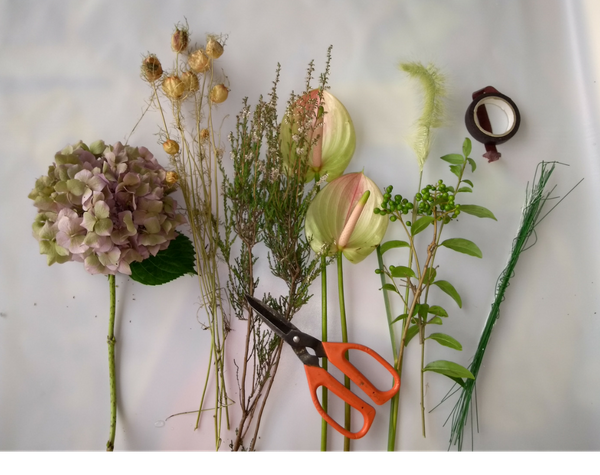
YOU WILL NEED:
- Long lasting flowers approximately 15 heads (Roses, Waxflower, Cornflowers, Hydrangeas. Etc.)
- Floristry Scissors
- Parafilm or Stemtex Tape
- Floristry Wires (varying in size from 0.28 to 0.90 gauge)
- Ribbon
Choose your materials wisely, the flowers will be out of the water so need to look as perfect in the evening as they did in the morning. Each stem needs to be replaced with a wire, so it can be easily manipulated. If the flower is heavy (such as a big blousy Rose) use a stronger wire like a 0.90-gauge wire. If its more delicate use a finer wire like a 0.28 gauge
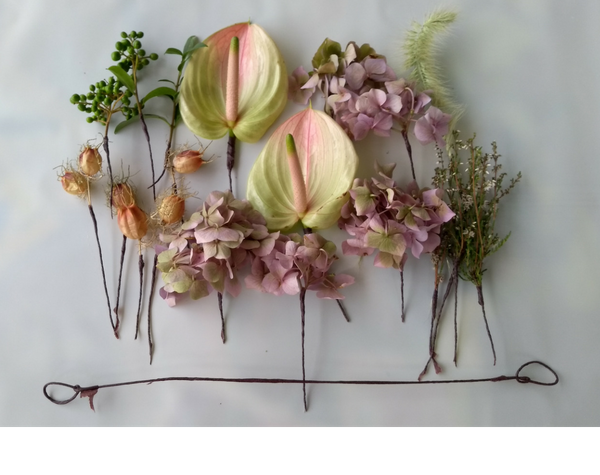
STEP 1
Using Parafilm tape, tape over each wire. For two reasons: first to keep the moisture of the original stem, to help the flower to last longer, and second to make sure you don’t have any sharp wires sticking out!
STEP 2
Create a base wire using two strong wires, taping them together to create the desired length. At either end create two loops (this is where the ribbon will go to tie the crown on)
STEP 3
Using the Parafilm tape, tape each wired stem on to the base wire. Making sure to keep the base wire flat on the back so that it is comfortable for the wearer. (Nobody wants flowers digging in to their forehead!)
STEP 4
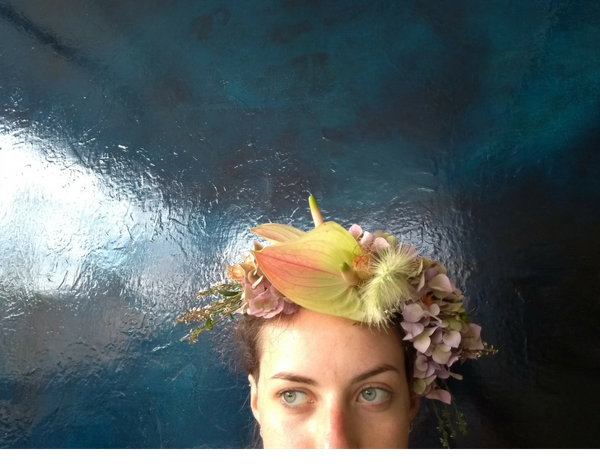
Once you’ve taped all the flowers on and your happy with how it is looking loop ribbon through the loops on the base wire. You should end up with something looking like the below!

STEP 5
Tie it on and get ready to receive all the compliments!
ABOUT LUCY C BURTON
Starting from humble beginnings for a small but very successful florist in Witham, Essex. Michelle's Floral Design helped me gain the confidence to go from beginner in floristry to having the confidence to teach my own classes, here I worked whilst studying floristry at Writtle College in Essex. Now based in London and working professionally for the top florists for many years including Rebel Rebel and Augustus Bloom. Lucy now teaches regular workshops that take place in Pearl, East London, as well as ones teaching how to make seasonal bouquets, hen parties, and also private lessons. During the summer months, she also does larger installation classes.